The Underground
In this section, I’ll cover a few tips that will hopefully help you spend more time enjoying London and less time figuring things out. I have a notoriously terrible sense of direction, and I find London fairly easy to navigate. In my experience, people are also generally friendly if you need help.
Getting AroundOur preferred mode of transportation in London is walking. You see so much; and for our family, it’s part of the experience. However, walking is obviously not always an option. The good news is that London has an incredible public transportation system. I’ve focused on the Underground, as I’ve never actively used the bus system. The few times I have, however, it was pretty easy as well.
The Underground, commonly called the Tube, is an easy, safe, and affordable way to get almost anywhere you want to go. There are stations everywhere. If you’ve never used it before, don’t be intimated the first time you see the Underground map. All it takes is a few minutes of studying, and it makes sense (even to me!). Here are a few tips:
PayingThere are numerous options (detailed below) for paying for your rides. Note that whatever method you use, you will need it at both ends of your trip, as how much you’re charged depends on the zones you travel in. You’ll almost certainly stay in Zone 1 for most of your trip.
Note: Kids under 11 travel for free on the Underground.
Apple PayIt’s available almost everywhere in London and is the easiest way to pay for the Underground (you must make sure Apple Pay is set up first). Just hold your phone up to the yellow circular reader on the turn style and Apple Pay should kick in.
Contactless credit cardThe UK is generally way ahead of us on credit card technology, and the latest is “contactless” payments, which means you simply tap your credit card on the reader and the transaction goes through. My newer US cards have this technology, while the older ones don’t. If you do have this type of card, you can simply tap it on the yellow circular reader, and the gate should open.
Oyster cardAn Oyster card is a pre-paid travel card. A refundable charge of five pounds is added the first time you get one, and you can put whatever amount of money you’d like on the card. You then just tap the Oyster card at the turnstile at both ends of your trip. You can buy the card and “top it up” (i.e., add money to it) using the machines at the front of any station. You can find out how much you have left on the card by holding it up to the reader on the machines. The turn styles (most of them anyway) will also quickly display your balance each time you exit a station and give you a “top up” warning when you get low.
If you don’t have Apple Pay or contactless, this is your best option, as unused funds up to 10 pounds – plus the deposit – can be refunded at the end of your stay. Just insert the card into a machine at a station, choose Oyster refund, and follow the instructions. If you have more than ten pounds left on the card, you have to request a refund by mail (something I would never in a million years take the time to do!).
Single journey ticketsNOT recommended, as the cost per ride is almost double what you pay when using Apple Pay, contactless, or an Oyster card. Single-day travel cards, which give you unlimited rides for a day, also generally work out to be more expensive. I haven’t done all the math on longer-term travel cards (week or more); but for short-term stays, they aren’t generally considered the best option.
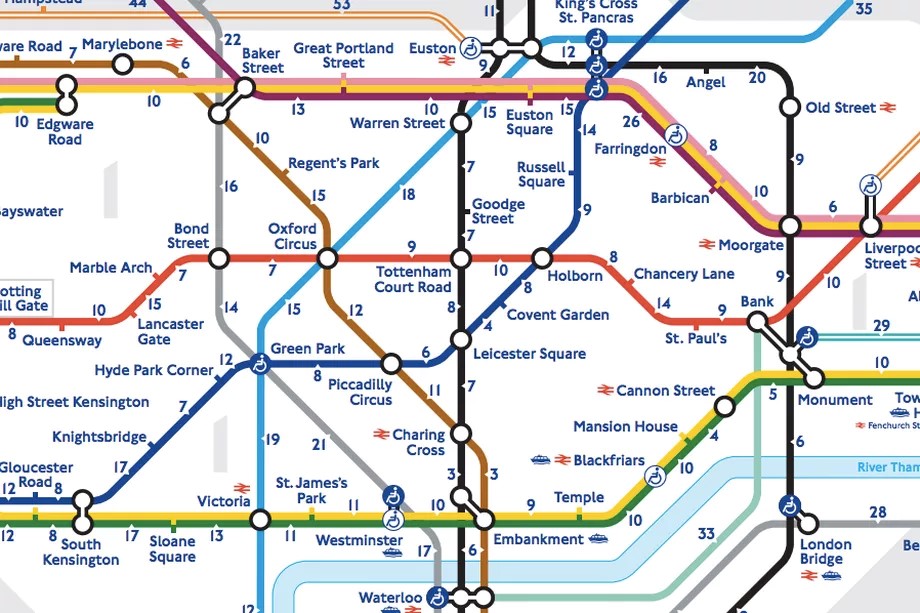
NavigationI recommend downloading an image of the Underground map on your phone (they used to have paper maps at every station, but I haven’t seen those in years…they may still exist). Each line has both a name and unique color; and once you get used to it, navigation is easy. A few tips…
Most platforms have digital signs showing which trains are coming next and how many minutes until they arrive.
Definitely avoid rush hour if you can, as it can get insanely and uncomfortably crowded. If traveling at a busy time, walk to the end of the platform so you can get on one of the end cars…almost always less crowded. Also be aware that the last trains for most lines are between 11:00 and midnight. Missing the last train is incredibly inconvenient! Not recommended.
Traveling with kidsRemember that kids under age 11 travel for free. Our kids have always done great on the Underground, but we have a family plan if we somehow get separated, which is as follows:
1) If a kid finds him or herself left behind at a station, our policy is that they should stay right where they are. We will come right back (with mom hysterical and in tears of course).2) If you find yourself on a train without one or more of us, everyone should get off the train at the next stop and stay there. An adult will find you! Thankfully, we’ve never had the opportunity to test out this policy.
Also,
3) if you have a stroller, there are shockingly few stations with elevators, and you often have to climb stairs. I highly recommend using a lightweight umbrella stroller that you can fold down and carry.
Escalators
This is a minor point, but always remember that people stand on the right hand side of the escalator and walk on the left. If you’re standing on the left, you’ll very shortly find yourself holding up a line of disgruntled passengers who will bowl you over if you don’t get out of the way pronto.
Note from Ed: This is not a minor point!